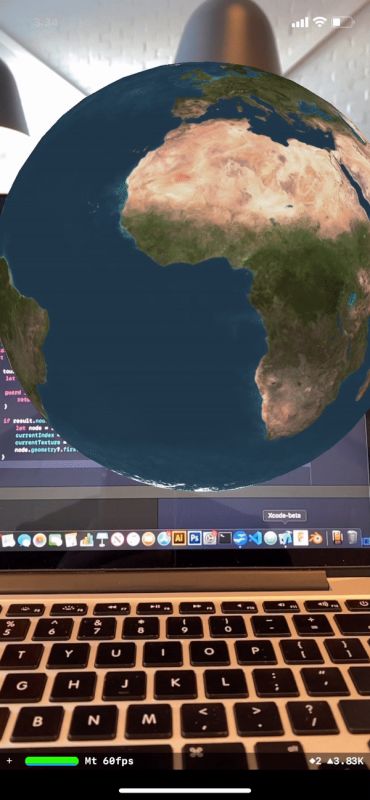
Why, you ask yourself, would you want to change the texture on a node (a node is any object within a SceneKit scene)? There are a variety of reasons. The simplest is that you want an indication that you’ve interacted with a node. Perhaps you have an AR game and you want to give players feedback that there’s a change in the game’s state. Maybe static textures get boring from time to time. Whatever the reason is, I’m here to provide a simple tutorial on how to change the textures on a running ARKit app through touch gestures.
Start by creating a new project. Instead of implementing the ARSCNView and boilerplate from scratch, select Augmented Reality App as your template and make sure SceneKit is the selected Content Technology.

Before you start any code, we need to add some images for our project. For this specific app, I went with a solar system theme and gathered textures for Earth, the moon and the Sun. That’s right — we’re going to be creating planetary bodies with our app. Make sure to name them “earth”, “moon” and “sun” respectively and drop them directly in the Assets.xcassets folder.
In ViewController.swift, start by declaring the following variables just above the viewDidLoad() method:
let textures = ["earth", "moon", "sun"]
var currentIndex = 0
var currentTexture = ""
Make sure the strings in the textures array have the same exact names as the textures in your Assets folder! Inside the viewDidLoad() method, replace where it says SCNScene(named: “art.scnassets/ship.scn”)! with SCNScene(). Underneath this line, initialize currentTexture to the first item in textures with currentTexture = textures[currentIndex].
After the viewWillDisappear() method, create the following function:
func createSphere() -> SCNNode {
  let sphere = SCNSphere(radius: 1)
  sphere.firstMaterial?.diffuse.contents = UIImage(named:
  currentTexture)
  let sphereNode = SCNNode(geometry: sphere)
  sphereNode.name = "sphere"
  sphereNode.position = SCNVector3(0, 0, -3)
  return sphereNode
}
It goes without saying that this function creates a sphere in our 3D space. We’re giving sphere a radius of 1 meter (as per ARKit’s default unit of measurement) and assigning it the texture of currentTexture, which should be “earth”. We’re then creating an SCNNode() and assigning it sphere’s geometry, as well as giving it the name “sphere” which will be important when we go about changing textures. We’re then positioning it 3 meters away from the camera when the app starts, and returning sphereNode.
In viewDidLoad(), add the following underneath where we assigned currentTexture:
sceneView.scene.rootNode.addChildNode(createSphere())
Test the app on your phone and if all goes well, you should see an augmented reality Earth in front of your eyes.
Now we get to work on changing textures with a touch gesture! Underneath the createSphere() method, implement the touchesBegan(_:with:).Note that there are other ways to implement the touch gesture — this is just one of them. Add the following code inside touchesBegan:
let touch = touches.first!
if touch.view == self.sceneView {
  let viewTouchLocation:CGPoint = touch.location(in: sceneView)

  guard let result = sceneView.hitTest(viewTouchLocation, options: nil).first else {
    return
  }
  if result.node.name == "sphere" {
    let node = result.node
    currentIndex = currentIndex == 0 ? 1 : currentIndex == 1 ? 2 : 0
    currentTexture = textures[currentIndex]
    node.geometry?.firstMaterial?.diffuse.contents = currentTexture
  }
}
Let’s go over this code block. First, we’re getting the first instance of a touch being detected. Then, we’re making sure that the touch was within the sceneView (if you’ve been following along, the sceneView should cover your phone’s entire screen by default because it automatically has 0 margins on each side). Then, we’re getting the CGPoint coordinates of the touch point relative to the screen. Next, we’re making sure that the we’re triggering sceneView’s hitTest by assigning it to result, otherwise we return. At this point, the code is free to check if we’re touching the node. If the name of the node that we’re touching is “sphere” (which we named as such earlier), then we need to change the texture of the sphere. Because I’ve only 3 textures, I’m using a ternary operator to cycle currentIndex from 0 -> 1 -> 2 then back to 0. I then re-assign currentTexture, and lastly, assign a new material to our node. Whew! Run your code and you should get the following result:

That’s all! I hope that this gives you a starting point for changing textures in ARKit. Feel free to check out the full source code here.
Here’s what I was able to create using the same workflow:

